How to BBQ St Louis Style Pork Ribs on a smoker
(
REVIEWS)
PREP:
15 minutes
TOTAL:
SERVES:
4
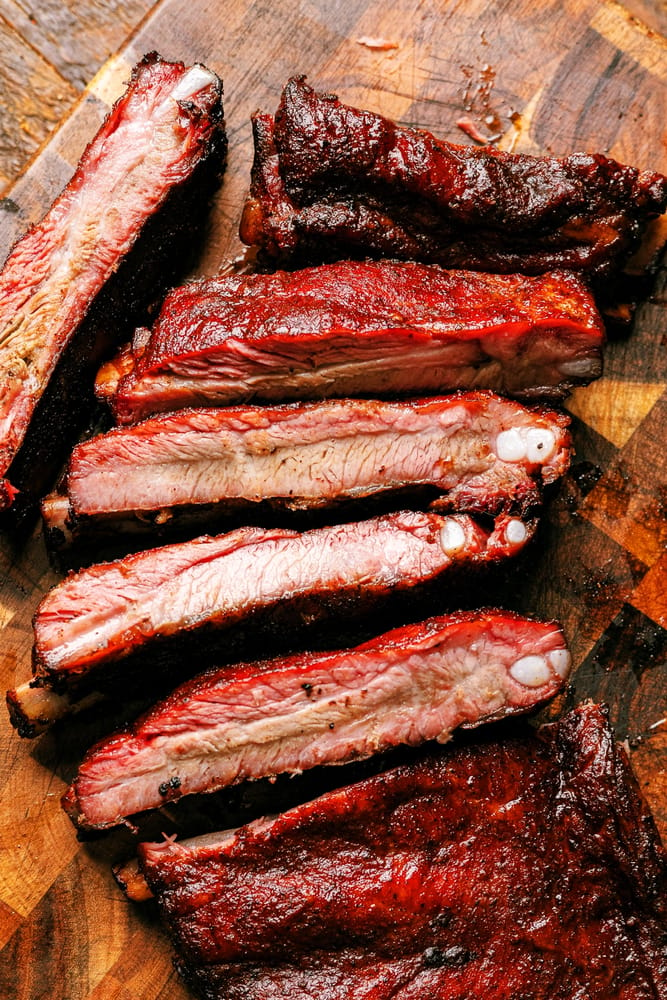
Ribs have always been one of my favorite things to make at get-togethers. My kids absolutely love picking apart ribs along with some pulled pork and baked beans. Growing up I remember those warm summer days when my dad would fire up the grill, and the irresistible aroma of smoky, slow-cooked ribs would fill the air, and thus a torch has been handed down.
There’s something incredibly satisfying about perfecting the art of BBQ, especially when it comes to mastering how to BBQ St. Louis ribs. These ribs are a hit not just with my kids, who love to dive in and get messy, but also with friends and extended family who often request them at gatherings.
After 10+ years on the internets, this is the culmination of what I’ve learned about BBQ St. louis ribs. From preparing the meat and applying the perfect dry rub to the cooking techniques that guarantee tender, juicy ribs every time, I’ve got you covered. Whether you’re a seasoned BBQ enthusiast or a beginner looking to impress at your next cookout, this guide will help you achieve mouthwatering results that will have everyone coming back for more.
Because every dad needs to have some killer rib recipes up their sleeve, and this one is definitely one to put on your list.
What are St. Louis-Style Ribs?
St. Louis ribs are a specific cut of pork ribs that come from the belly side of the pig, just below the baby back ribs. Understanding the different types of ribs can help you make the best choice at the butcher shop, ensuring you get the right cut for your BBQ.
Key Characteristics:
- Uniform Shape: St. Louis-style ribs are trimmed into a rectangular shape by removing the sternum bone, cartilage, and rib tips. This not only gives them a more uniform appearance but also helps them cook more evenly.
- Meatiness: Compared to baby back ribs, St. Louis ribs are meatier with a higher fat content. This extra fat adds flavor and keeps the meat tender during the long, slow cooking process.
- Size: They are generally larger and flatter than baby back ribs, making them easier to brown and ensuring a more even cook.
Differences from Other Ribs:
- Baby Back Ribs: These come from the upper part of the rib cage, near the spine. They are shorter, curved, and contain less fat. Baby back ribs cook faster than St. Louis ribs and are often considered more tender, but they have less meat.
- Spare Ribs: These are the untrimmed version of St. Louis ribs. They come from the belly side of the rib cage and include the rib tips, cartilage, and sometimes the sternum. Spare ribs are larger, and the extra bones and cartilage can make them a bit more challenging to eat, but they are also very flavorful, although a lot of gristle.
- Country-Style Ribs: These are not true ribs but are cut from the blade end of the loin near the shoulder. They are meatier than both baby back and St. Louis ribs and can be sold either bone-in or boneless.
Why Choose St Louis Style Ribs?
- Flavor: The higher fat content in St. Louis-style ribs means they are packed with flavor. As the ribs cook, the fat renders, basting the meat and keeping it moist.
- Cooking Uniformity: The uniform rectangular shape helps the ribs cook evenly. This is particularly beneficial for grilling and smoking, where even cooking is crucial.
- Presentation: St. Louis-style ribs have a clean, professional appearance that makes them a favorite for competitions and special occasions.
Buying Tips:
- Look for Marbling: Just like with steak, marbling (the white streaks of fat within the meat) is a good indicator of quality. More marbling means more flavor and juiciness.
- Check the Color: Fresh ribs should have a bright pink color. Avoid ribs that look dull or have dark spots, as this can indicate older meat.
- Ask Your Butcher: Don’t hesitate to ask your butcher to trim the ribs St. Louis-style if they aren’t already. They can also offer advice on the best ribs available and might have some insider tips for cooking them.
Equipment Needed to BBQ St. Louis-Style Ribs
To BBQ St. Louis-style ribs successfully, having the right equipment is essential. Here’s a list of the core essentials:
Smoker or Grill:
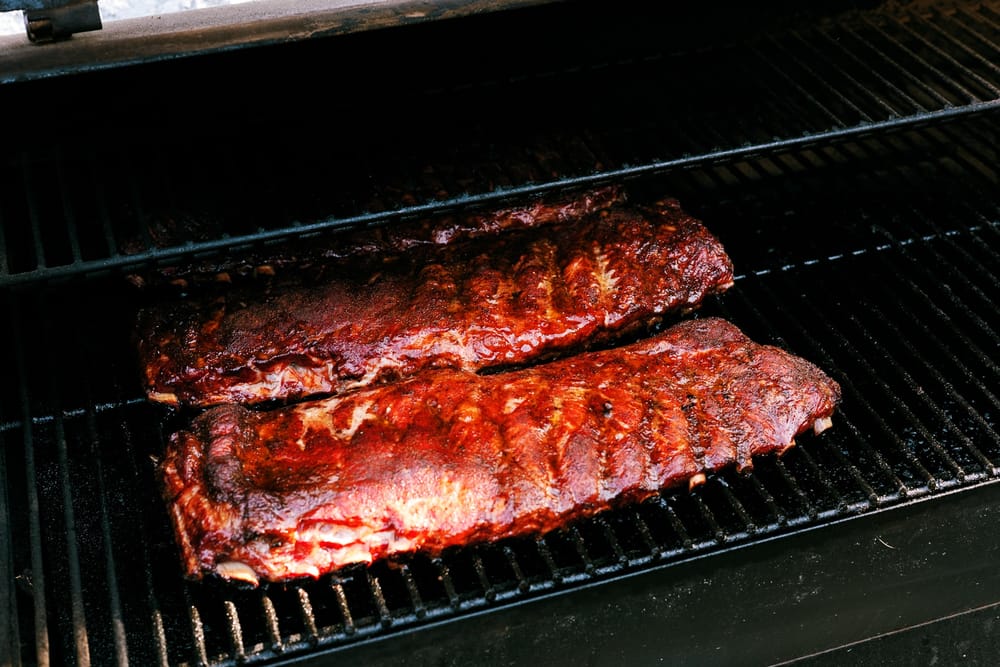
- Pellet Grill: A Traeger or similar pellet grill is excellent for maintaining consistent temperatures and infusing a smoky flavor.
- Water Smoker: My Weber Smoky Mountain is a go to when I’m in the mood for some smoky ribs, It makes amazing pulled pork and uses water to maintain a consistent temperature and keep the meat moist.
- Charcoal Grill: This can be done, but it’s quite finnicky. I recommend a large weber kettle with a slow n sear attachment to get this done.
Wood Chips/Chunks:
- Wood Chips: Hickory and applewood are excellent choices for St. Louis ribs. They add a burst of smoke flavor.
- Wood Chunks: Burn longer than chips and provide consistent smoke, ideal for longer smoking sessions.
Thermometer:
- Wireless Meat Thermometer: Some like sitting out and baby sitting their smokers, but by the end of the night i’m so overloaded by the smell of smoke, I want nothing to do with the meat. Watch the temp from afar and get yourself a good wireless thermometer.
Aluminum Foil: Not the thin stuff, get the thicker foil for bbq. This is necessary for the 3-2-1 method. Experiment with Butcher paper too!
Spritzer Bottle: For spritzing the ribs with a 50/50 blend of apple cider vinegar and apple juice during the cooking process to keep the ribs moist and add flavor.
Sharp Knife: You’ll want a good sharp knife for trimming the ribs and scoring the silverskin. I recommend a Curved boning knife and a meat slicer.
Grill Tongs: Save your hands and get some long-handled tongs for flipping and handling the ribs on the grill.
The 3-2-1 Method for BBQ St. Louis-Style Ribs
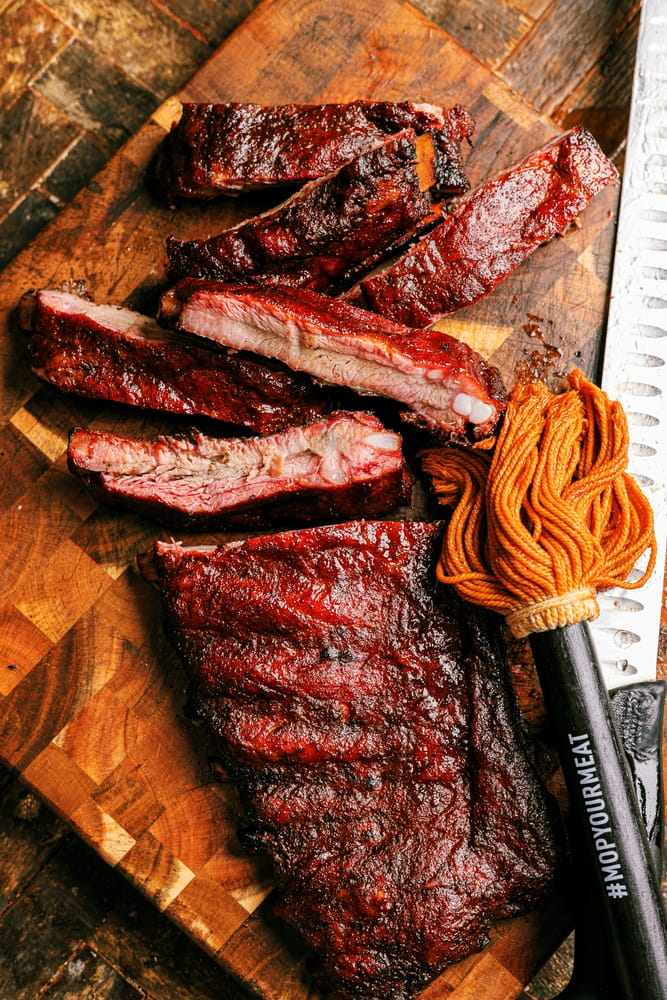
The 3-2-1 method is a popular technique for achieving tender, flavorful slow cooked St. Louis-style ribs. This method breaks down the cooking process into three distinct phases: smoking, wrapping, and finishing. Here’s a detailed look at how to apply the 3-2-1 method to your ribs:
Smoke for 3 Hours
The first phase involves smoking the ribs uncovered. This step allows the ribs to absorb the smoky flavor and begin the cooking process.
- Preparation: Preheat your smoker to 225°F. If you’re using a pellet grill, ensure the hopper is filled with your choice of wood pellets (hickory or applewood are great options). For a water smoker, make sure the water pan is filled.
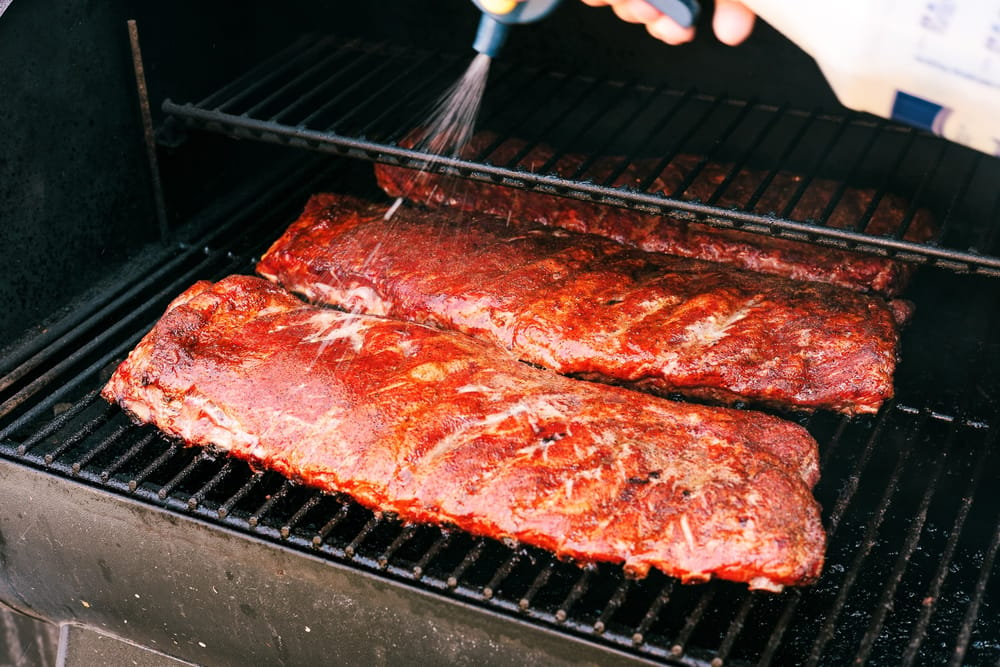
- Smoking: Place the ribs on the smoker grates, bone side down. Smoke the ribs at 225°F for 3 hours. During this time, spritz the ribs with a 50/50 blend of apple cider vinegar and apple juice every 45 minutes to keep them moist and enhance the flavor.
Wrap for 2 Hours
The second phase involves wrapping the ribs in aluminum foil to steam and tenderize the meat.
- Wrapping: After 3 hours of smoking, remove the ribs from the smoker. Place each rack of ribs on a large piece of aluminum foil. Before wrapping them tightly, add a splash of the apple cider vinegar and apple juice mixture, and a sprinkle of brown sugar on top of the ribs. This will help create a flavorful steam.
- Steaming: Return the wrapped ribs to the smoker and cook for another 2 hours at the same temperature (225°F). The foil will trap moisture and heat, tenderizing the meat and infusing it with additional flavor.
Unwrap and Finish for 1 Hour
The final phase involves unwrapping the ribs and returning them to the smoker to develop a beautiful, caramelized glaze.
- Unwrapping: Carefully remove the ribs from the foil and place them back on the smoker grates. Increase the temperature to 250°F.
- Basting: Brush the ribs with your favorite BBQ sauce (like Lillie Q BBQ sauce or your homemade version). Let them cook for 30 minutes, then brush with more sauce and cook for an additional 30 minutes. This step allows the sauce to caramelize and form a delicious sticky glaze.
- Final Check: After the last hour, the ribs should be tender, with a nice glaze. The internal temperature should reach around 190°F to 205°F. The meat should pull away from the bones easily.
Alternative Simple Method:
If you prefer a simpler approach, you can smoke the ribs at 250°F for about 4-5 hours, spritzing with the apple cider vinegar and apple juice mixture every 45 minutes until done. Pull the ribs when they just begin to break skin when lifted off the grill. Wrap them in foil for an hour, then bring them back to the grill for another 30 minutes at 300°F, mopping with BBQ sauce.
Additional Tips:
- Resting: If you have time, pull the ribs before the final hour of cooking and let them rest overnight. Then, bring them back up to temperature slowly. This makes for amazingly juicy ribs due to the resting period allowing the juices to redistribute.
- Temperature Control: Use a wireless thermometer to monitor the temperature. With a water smoker, make small adjustments and let the fire settle for about 15 minutes before making another adjustment.
- Humidity Control: Wrapping ribs in a 3-2-1 or 4-1-1 method helps maintain moisture. Experiment with spritzing throughout the cook. Using a water pan can also maintain humidity, but avoid overdoing it as too much humidity can prevent a bark from setting.
Should BBQ Ribs Be Fall Off The Bone Tender?
Should Ribs be fall off the bone? To me there’s a thin line between fall off the bone tender, and just plain overcooked. But the best part of backyard bbq? It’s yours, so make it how you want! Here’s a run down on each school of thought:
Fall-Off-the-Bone Tenderness
Characteristics:
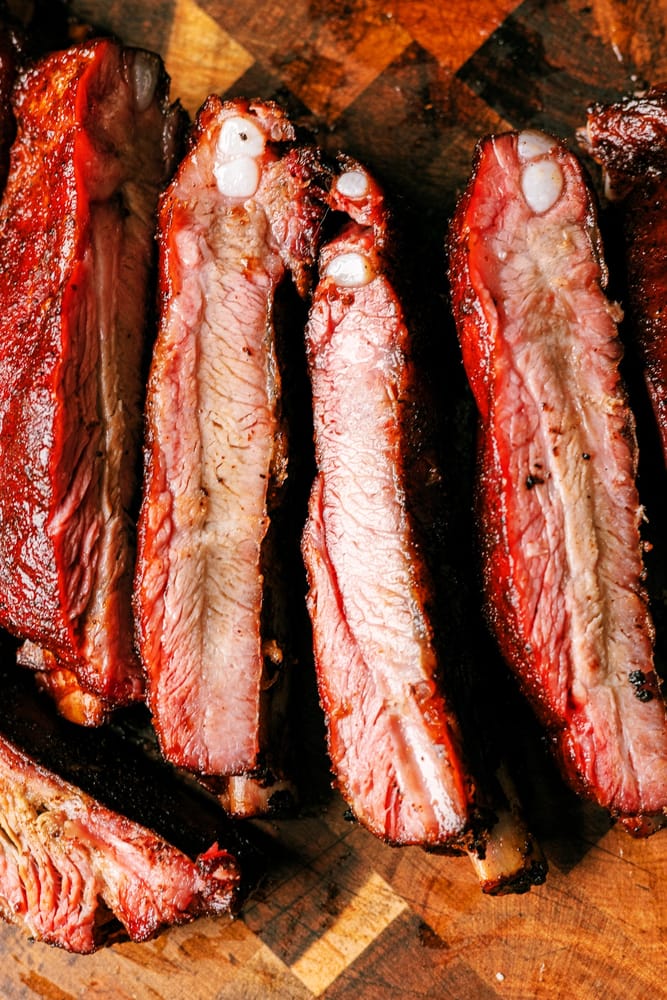
- Texture: As the name suggests, fall-off-the-bone ribs are so tender that the meat easily separates from the bones with little effort. This style is popular for casual gatherings and family BBQs because of its melt-in-your-mouth appeal.
- Cooking Method: Achieving fall-off-the-bone tenderness often involves cooking the ribs for a longer period or at a slightly higher temperature to ensure the collagen breaks down completely.
How to Achieve:
- 3-2-1 Method: Follow the 3-2-1 method where the ribs are smoked for 3 hours, wrapped and cooked for 2 hours, and then unwrapped and finished for 1 hour. The wrapping phase with added moisture helps tenderize the meat to the point where it easily falls off the bone.
- Additional Tips: Ensure you keep the temperature consistent and use a spritzing method to maintain moisture. For even more tenderness, consider resting the ribs overnight before the final cooking phase.
Best For:
- Family gatherings
- Casual BBQs
- Those who prefer extremely tender and juicy ribs
Competition-Style Tenderness
Characteristics:
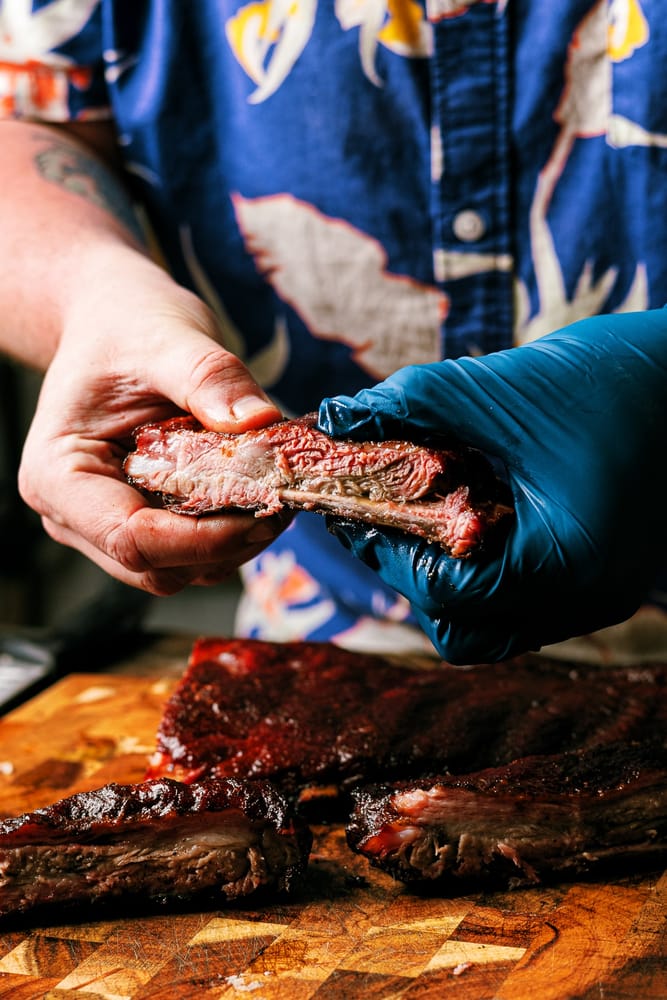
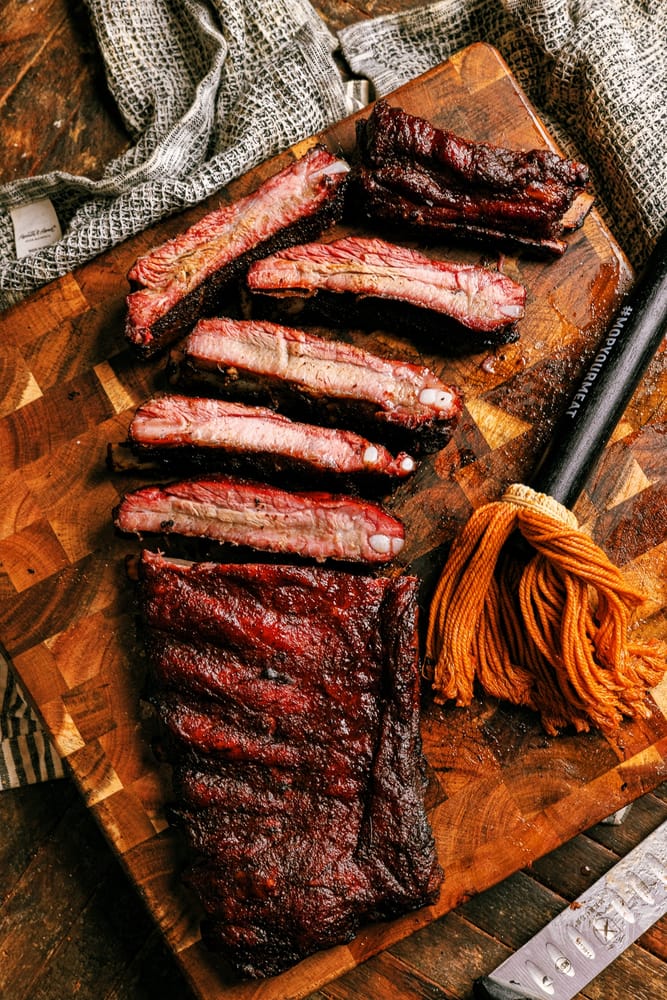
- Texture: Competition-style ribs are tender but have a slight bite to them. The meat should pull cleanly away from the bone when bitten, without completely falling off. This style is preferred in BBQ competitions where judges look for a balance between tenderness and texture.
- Cooking Method: To achieve competition-style tenderness, the ribs are cooked to a precise internal temperature and monitored closely to avoid overcooking.
How to Achieve:
- Modified 3-2-1 Method: You can still use the 3-2-1 method but reduce the wrapping time slightly to about 1 hour instead of 2. This helps maintain the meat’s integrity while still making it tender.
- Temperature Monitoring: Use an instant-read thermometer to check the internal temperature. Aim for an internal temperature of around 190°F to 195°F. At this range, the ribs are tender but still have a bit of chew.
- Finishing Touches: After unwrapping, baste the ribs with BBQ sauce and finish cooking them at a higher temperature to develop a good crust without over-tenderizing the meat.
Best For:
- BBQ competitions
- Experienced BBQ enthusiasts
- Those who appreciate a balance of tenderness and bite
note: if this is your first time, I would work may way to competition-style. When cooking for family, err on the side of overcooked. There’s a fine line between tough, and competition-style tenderness, but when achieved its the chefs kiss!
Key Differences:
- Cooking Time: Fall-off-the-bone ribs generally require a longer cooking time, especially during the wrapping phase, to achieve the desired tenderness. Competition-style ribs are cooked just long enough to ensure tenderness without compromising texture.
- Texture: Fall-off-the-bone ribs are extremely tender, with the meat easily separating from the bone. Competition-style ribs, while still tender, retain some chew and should cleanly pull away from the bone when bitten.
- Moisture Control: Maintaining moisture is crucial for both styles, but fall-off-the-bone ribs benefit from more aggressive moisture retention techniques like extended wrapping and spritzing.
Choosing Your Style:
- Decide based on your audience and preferences. If you’re cooking for a family gathering where everyone loves super tender ribs, go for the fall-off-the-bone style. If you’re preparing for a competition or want to impress BBQ aficionados, aim for the competition-style tenderness.
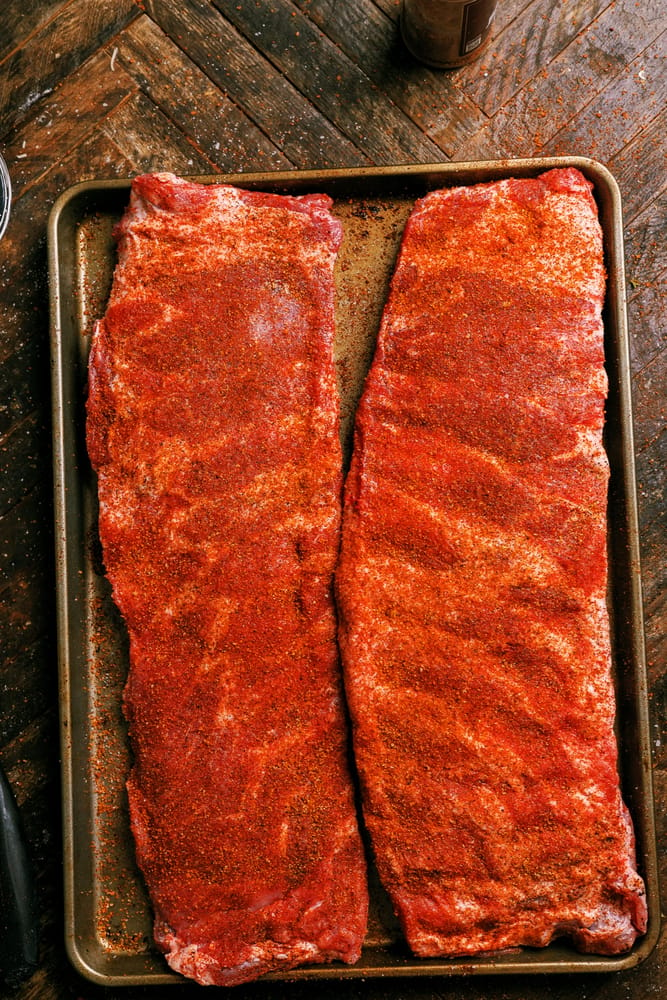
Rub Recipe for St. Louis-Style Ribs
A good rub is essential for enhancing the flavor of your St. Louis-style ribs. This rub recipe balances heat and smokiness, creating a delicious crust that complements the natural flavors of the meat without the risk of bitterness from sugar during long cooks.
Instead, we’ll infuse sweetness by spritzing with an apple cider vinegar and apple juice mixture.
Here’s a simple yet flavorful spice rub recipe you can use:
Ingredients
- 2 tbsp paprika
- 1 tbsp black pepper
- 1 tbsp salt
- 1 tbsp chili powder
- 1 tbsp garlic powder
- 1 tbsp onion powder
- 1 tsp cayenne pepper
Directions for BBQing St. Louis-Style Ribs
Achieving perfectly smoked St. Louis-style ribs involves several key steps. This is the best way to make ribs and they come out amazing every time. Just follow these steps:
Instructions
1. Preparing the Ribs:
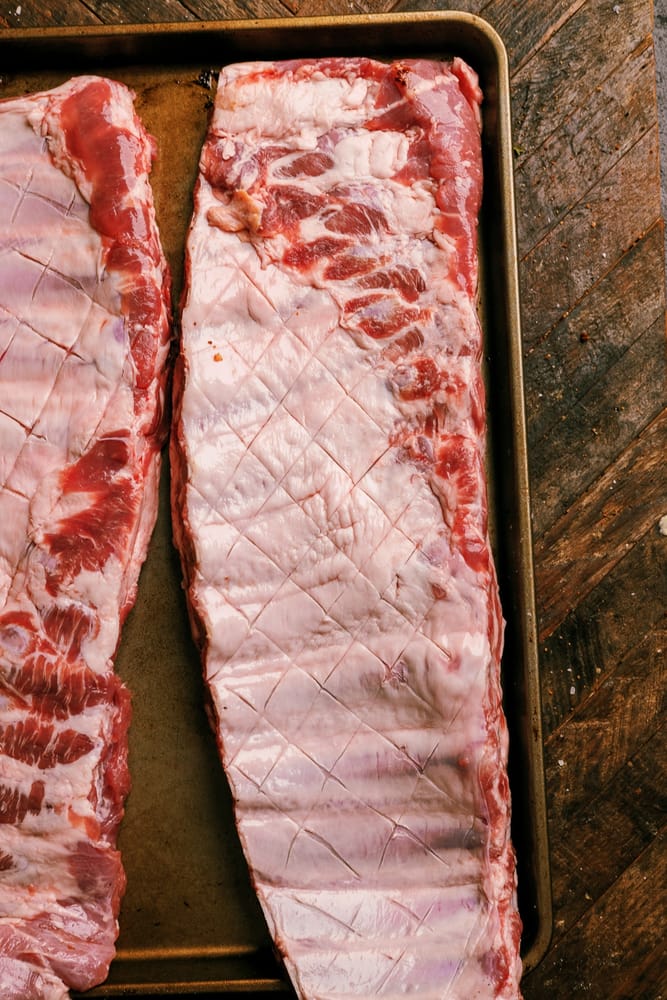
- Remove or Score the Silverskin:
- Flip the ribs over to the bone side. Use a paper towel to grip the corner of the silverskin and pull it off. If it’s difficult to remove, use a sharp knife to score the silverskin, making shallow cuts across the membrane. This will allow the rub to penetrate and help tenderize the meat.
2. Applying the Rub:
- Mix the Rub:
- In a medium-sized bowl, combine 2 tbsp paprika, 1 tbsp black pepper, 1 tbsp salt, 1 tbsp chili powder, 1 tbsp garlic powder, 1 tbsp onion powder, and 1 tsp cayenne pepper. Mix well to ensure an even distribution of spices.
- Coat the Ribs:
- Generously coat both sides of the ribs with the rub. Use your hands to massage the rub into the meat, ensuring it adheres well. Let the ribs sit at room temperature for about 30 minutes to allow the flavors to meld.

3. Setting Up the Smoker:
- Preheat the Smoker:
- Preheat your smoker to 225°F. If you’re using a pellet grill, ensure the hopper is filled with your choice of wood pellets (hickory or applewood are great options). For a water smoker, fill the water pan to help maintain a consistent temperature and keep the meat moist.
4. Smoking the Ribs:
- Initial Smoking:
- Place ribs on the smoker grates, bone side down. Smoke the ribs at 225°F for 4 hours. During this time, spritz the ribs with the 50/50 blend of apple cider vinegar and apple juice every 45 minutes to keep them moist and enhance the flavor.
5. Wrapping the Ribs:
- Wrap and Cook:
- After 4 hours of smoking, remove the ribs from the smoker. Place each rack of ribs on a large piece of aluminum foil. Before wrapping them tightly, add a splash of the apple cider vinegar and apple juice mixture, and a sprinkle of any remaining rub. This will help create a flavorful steam.
- Return the wrapped ribs to the smoker and cook for another 1 hour at the same temperature (225°F). The foil will trap moisture and heat, tenderizing the meat and infusing it with additional flavor.
6. Unwrapping and Finishing:
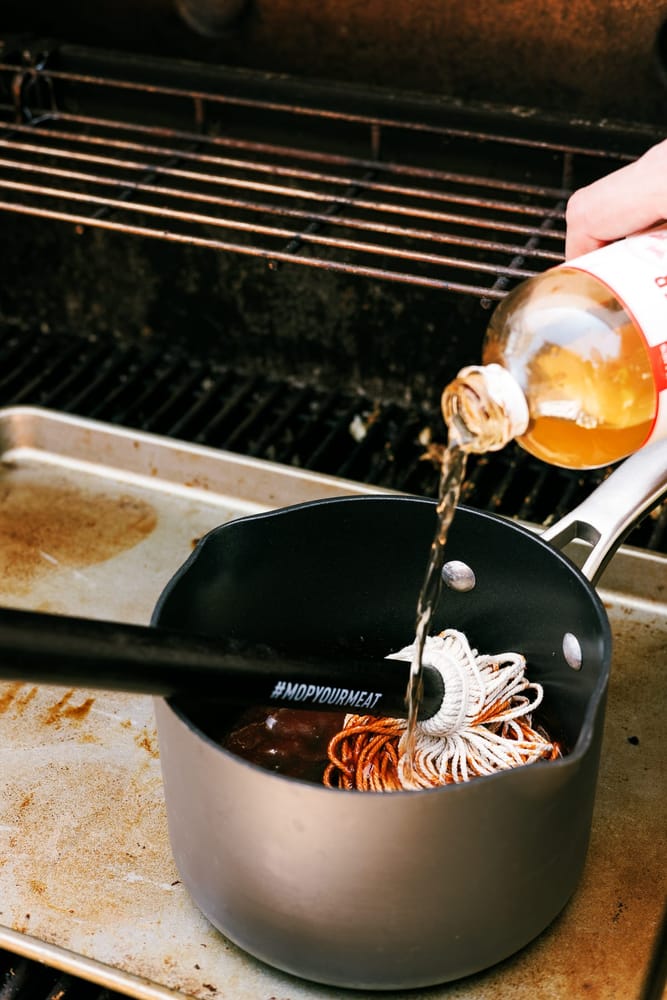
- Unwrap and Glaze:
- Carefully remove the ribs from the foil and place them back on the smoker grates. Increase the temperature to 250°F.
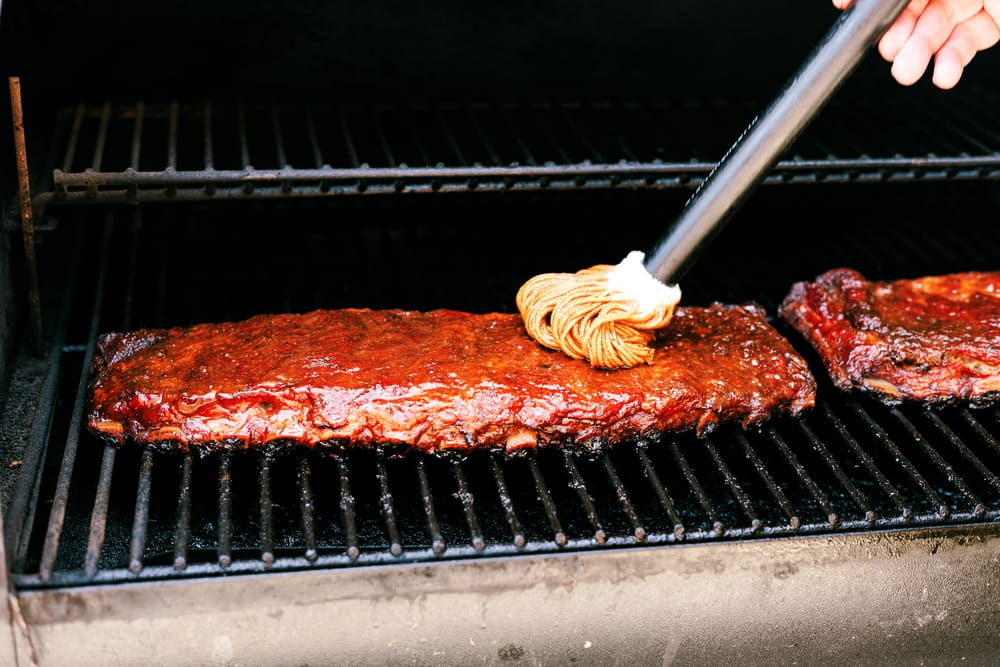
- Brush the ribs with your favorite BBQ sauce (such as Lillie Q BBQ sauce or your homemade version). Let them cook for 30 minutes, then brush with more sauce and cook for an additional 30 minutes. This step allows the sauce to caramelize and form a delicious sticky glaze.
7. Checking for Doneness:
- Temperature Check:
- After the last hour, the ribs should be tender, with a nice glaze. The internal temperature should reach around 190°F to 205°F.
- Visual Check:
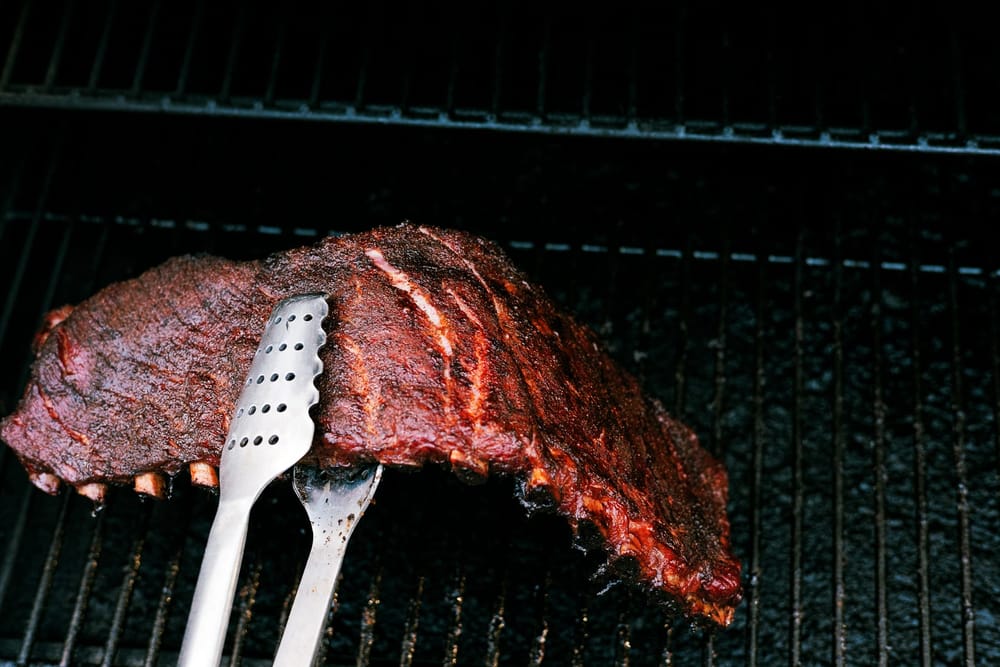
- The ribs are done when they bend slightly and the meat starts to crack when lifted with tongs.
8. Serving the Ribs:
- Rest and Slice:
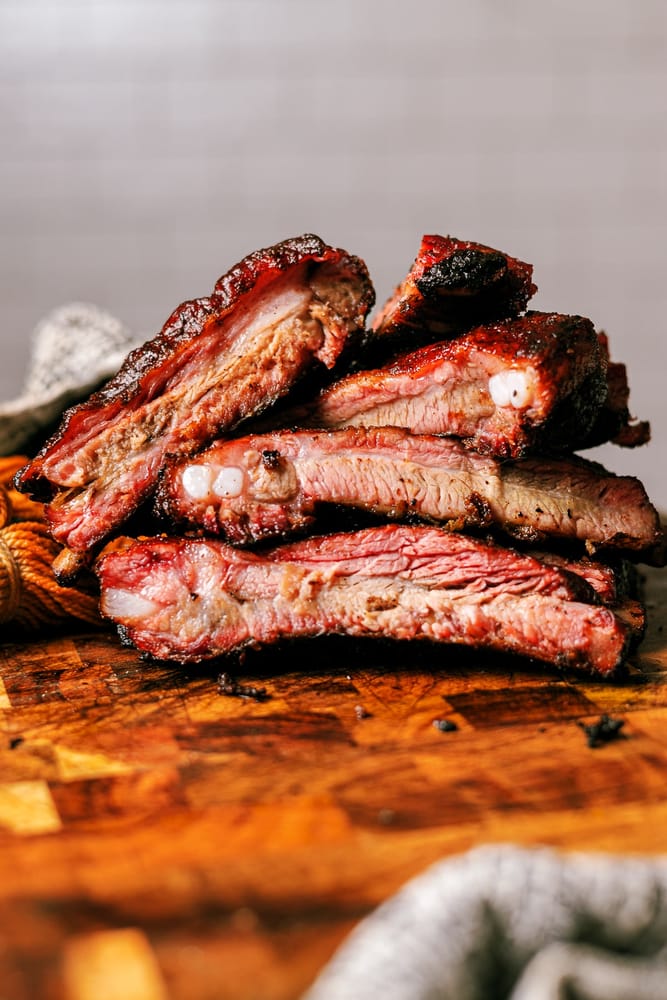
- Let the ribs rest for about 10 minutes before slicing. This allows the juices to redistribute throughout the meat, ensuring moist and flavorful ribs.
- Slice the ribs between the bones and serve with classic sides like potato salad, coleslaw, or baked beans. Optionally, drizzle with mango habanero sauce or a tangy bbq for an extra kick.
St Louis Style Ribs FAQ
Yes, you can make St. Louis-style ribs ahead of time. After smoking and wrapping, let the ribs cool slightly, then wrap them tightly in aluminum foil and refrigerate for up to 2 days.
When ready to serve, reheat the wrapped ribs at 250°F until they reach an internal temperature of 165°F, then unwrap, apply BBQ sauce, and finish on the grill or in the oven at 300°F for 30 minutes to caramelize the sauce.
Yes, you can freeze ribs. After cooking, let the ribs cool completely, cut into sections, then wrap them tightly in aluminum foil and place them in a freezer-safe bag or container. They can be frozen for up to 3 months.
To reheat, thaw the ribs in the refrigerator overnight, then reheat at 250°F until they reach an internal temperature of 165°F. Finish on the grill or in the oven to caramelize the BBQ sauce.
Yes, you can use a gas grill to cook St. Louis-style ribs. To mimic the smoking process, use a smoker box or make a pouch with aluminum foil filled with wood chips.
Place the pouch over one burner, turning it on high to produce smoke, while keeping the other burners off for indirect heat. Maintain the grill temperature at around 225°F and follow the same smoking and wrapping steps.
Let the ribs rest for about 10 minutes after cooking. Resting allows the juices to redistribute throughout the meat, ensuring that the ribs are moist and flavorful when you slice and serve them.
Absolutely! You can prepare the rub and spritzing mixture in advance. The rub can be stored in an airtight container in a cool, dark place for several months. The spritzing mixture can be made and stored in a spray bottle in the refrigerator for up to a week. Preparing these components in advance can save you time on the day of your BBQ.

BBQ St. Louis-Style Ribs
Ingredients
- 2 racks St. Louis-style ribs
Rub:
- 2 tbsp paprika
- 1 tbsp black pepper
- 1 tbsp salt
- 1 tbsp chili powder
- 1 tbsp garlic powder
- 1 tbsp onion powder
- 1 tsp cayenne pepper
Spritzing Mixture:
- 1 cup apple cider vinegar ACV
- 1 cup apple juice
- Your favorite BBQ sauce
Instructions
- Prepare the Ribs: Remove or score the silverskin on the back of the ribs.
- Mix the Rub: Combine all rub ingredients in a bowl. Coat both sides of the ribs generously with the rub and let them sit at room temperature for 30 minutes.
- Set Up the Smoker: Preheat your smoker to 225°F. Fill the hopper with wood pellets (hickory or applewood) or fill the water pan for a water smoker.
- Smoke the Ribs: Place the ribs on the smoker grates, bone side down. Smoke for 4 hours, spritzing with the ACV/apple juice mixture every 45 minutes.
- Wrap the Ribs: Remove the ribs and place them on aluminum foil. Add a splash of the spritzing mixture, wrap tightly, and return to the smoker for 1 hour.
- Unwrap and Finish 1 Hour: Increase the temperature to 250°F. Unwrap the ribs, brush with BBQ sauce, and cook for another hour, basting every 15-20 minutes.
- Check for Doneness: Ensure the internal temperature reaches 190°F to 205°F. The ribs should be tender and the meat should pull away from the bones easily.
- Rest and Serve: Let the ribs rest for 10 minutes before slicing. Serve with your favorite sides.
Notes
Adjust the amount of cayenne pepper to your heat preference.
You can make the rub and spritzing mixture in advance for convenience. Check out my BBQ sauce recipe here
