
DIY Tabletop Light For Food Photography
 If you’ve been researching how to shoot food photography, 9 times out of 10 you’ve probably run into a post recommending a Lowel EGO Tabletop Light. It’s a great light to get a natural daylight effect to your photos when you’re chasing the available light around in your house, trying to get that hero shot!

My one issue with this light is the price tag, and how prone I am to breaking CFL bulbs. Coming from a background in shooting product photography on the side in the past, I’ve made a few continuos light rigs on my own. I went from using continuous, then moved own to buying my own strobes, then sold everything and started all over when I decided to start a food blog.
Being on a budget, especially when saving up for a new camera, it was hard for me to justify spending the money on the light when I could buying good 50mm for the same price of buying 2 Lowel EGOs. So I decided to put something together myself for about 1/3 the cost (even more depending on where you buy it!)
So after seeing how exactly the Lowell EGO was put together I tried to find out how I could pull the same thing off without spending close to the same money for it. Now that I’ve been using it for about a month I decided to share how I built it for anyone curious on how this was put together.
What you Need to build your won DIY tabletop light
To make this super simple, I’ve provided a list of items to start with, if you feel you want something that will last longer I’ve provided some rugged “upgrades”
Note: I found the light and kit at home depot, but am providing links in case you can’t find it (amazong affiliate links, obvi.)
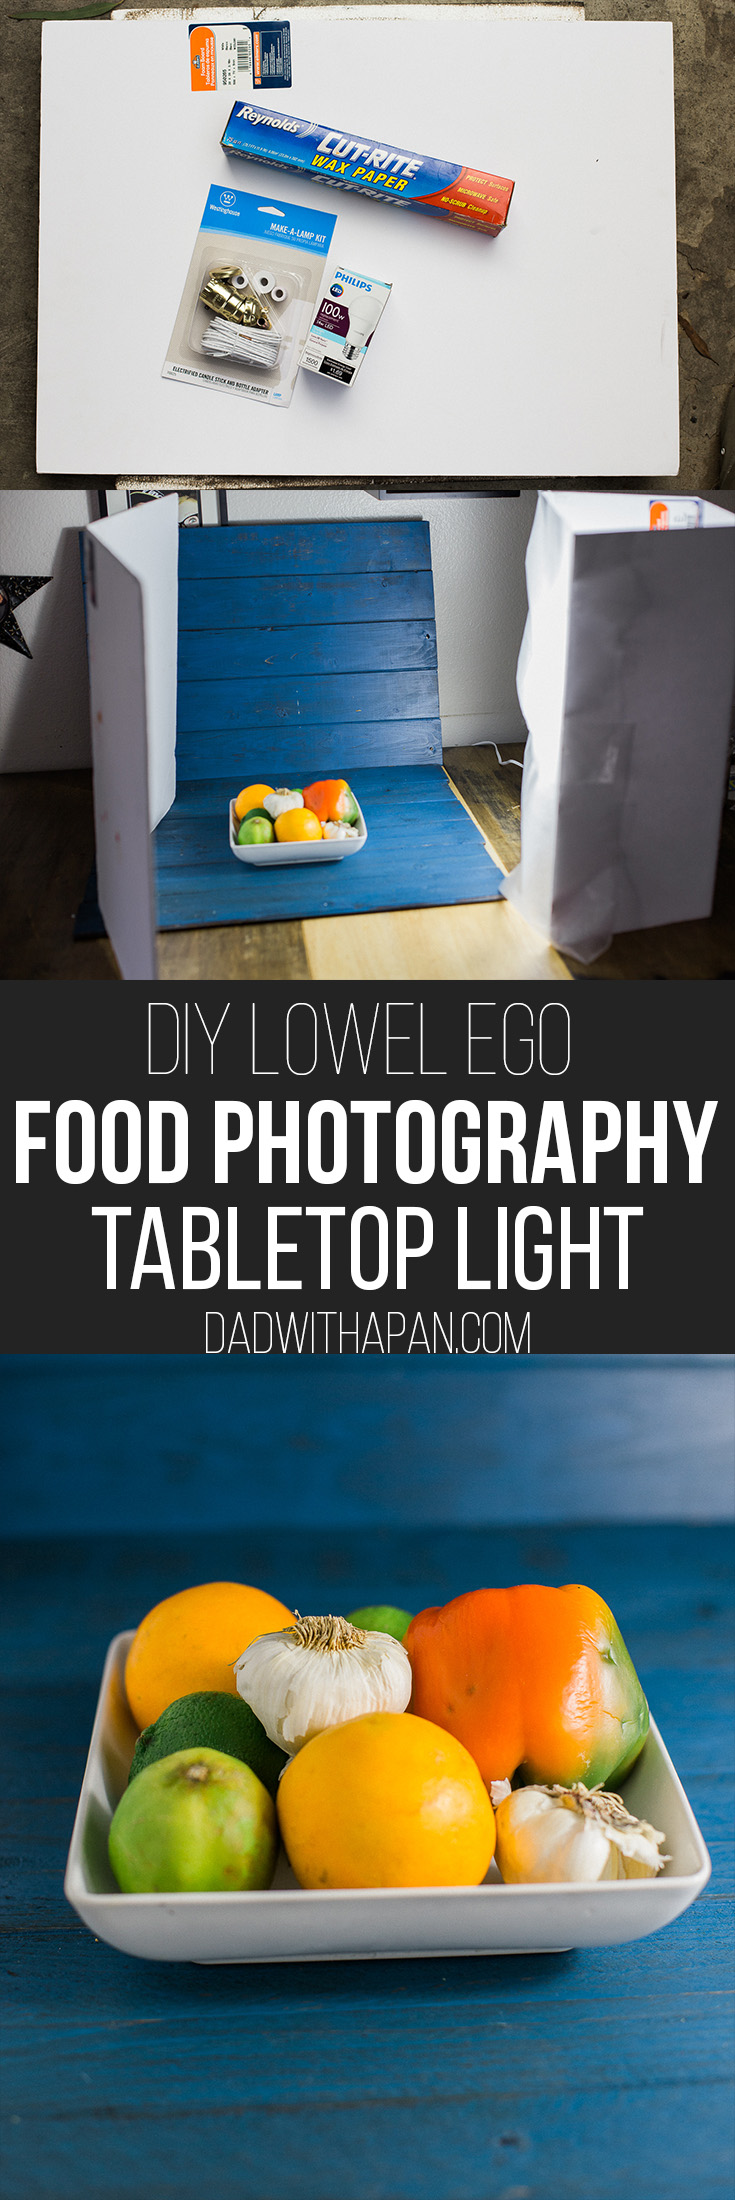
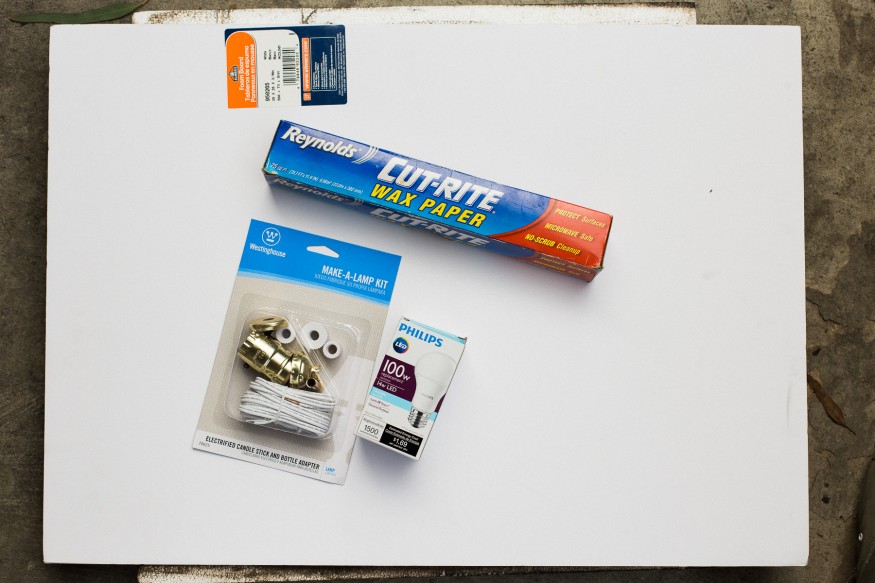
Base Items
(2) 20 x 28 Foam Poster boards – $2.99 each
Westinghouse Make-A-Lamp Kit – $10.99
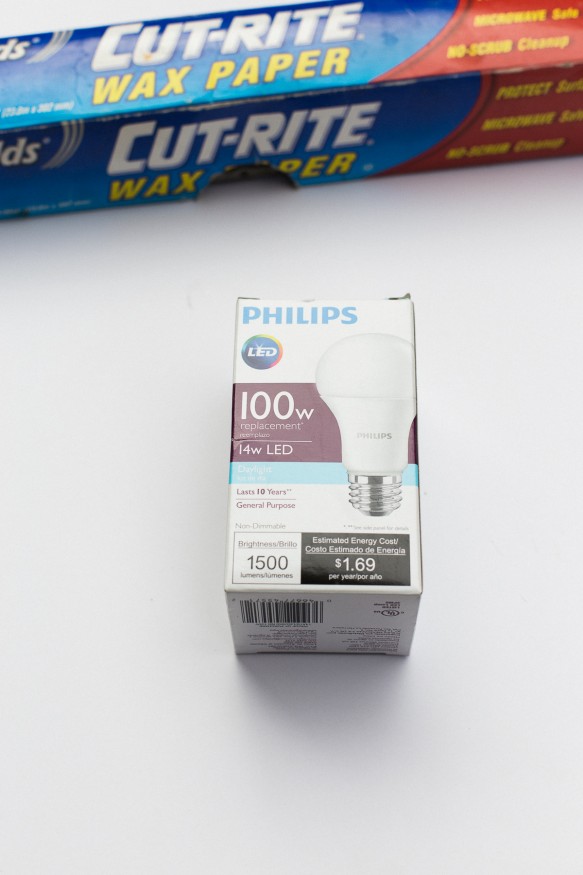
Philips 100W Equivalent Daylight 5000K LED Light Bulb – $9.99
Wax Paper – $.99
Packing Tape – $1.99
Total Cost: Roughly $30
If you want a more rugged build (costs a little more):
Replace 1 Poster board with Coroplast Sign board – $5.99
Replace Wax paper with a couple yards of Diffuser Material – $9.99/yard
Total Cost: additional $30
Note on the Light
The Closest LED equivalent to the Lowell 5200k CFL light I’ve found is by Phillips and about 5 bucks cheaper, It’s 5000k but if you white balance correctly in post, it doesn’t seem to make a difference.
How To Assemble Your DIY Tabletop Light
Score A Poster board in thirds
Before anything, get the poster board scored into even thirds, then mark a spot in the center where the light will go. We’re doing this first because it’s easier to do before connecting the light.

Take a knife and score along the lines as deep as possible without cutting through to the other side…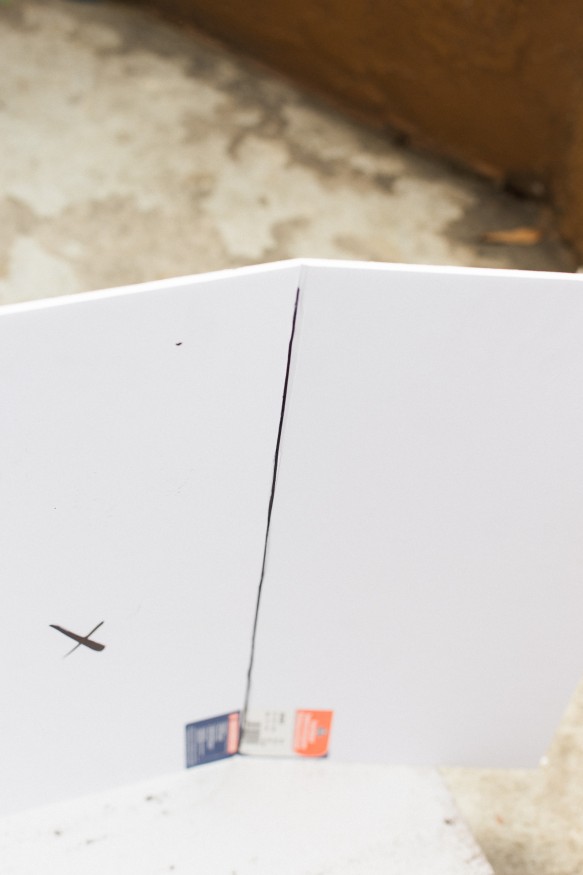
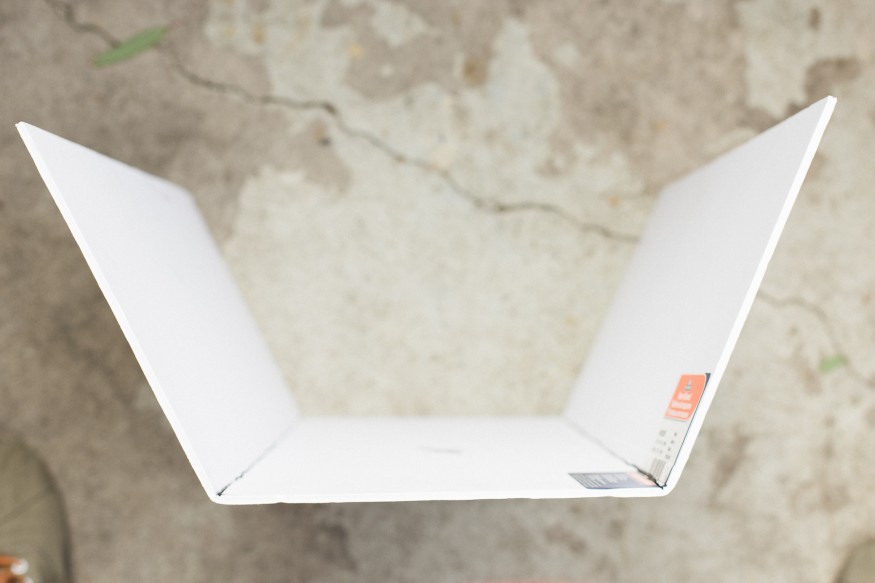
… then fold the board into a trifold. You’ll need to put some pressure on the board to make it bend easily back and forth, you’ll want it to sit naturally somewhere around this angle:
Assembling the Lamp Kit And Connecting To The Board
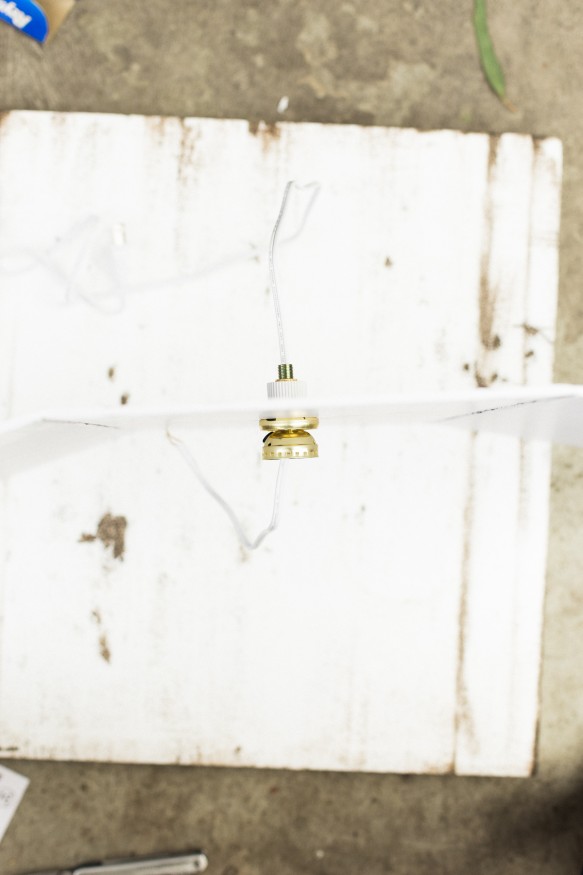
This is a lot easier than the directions on the back make it seem. Take the larges of the 3 white adapters and thread the “nipple” (it’s the long brass piece with a nut on it) as instructed on the box. It’ll look like this..
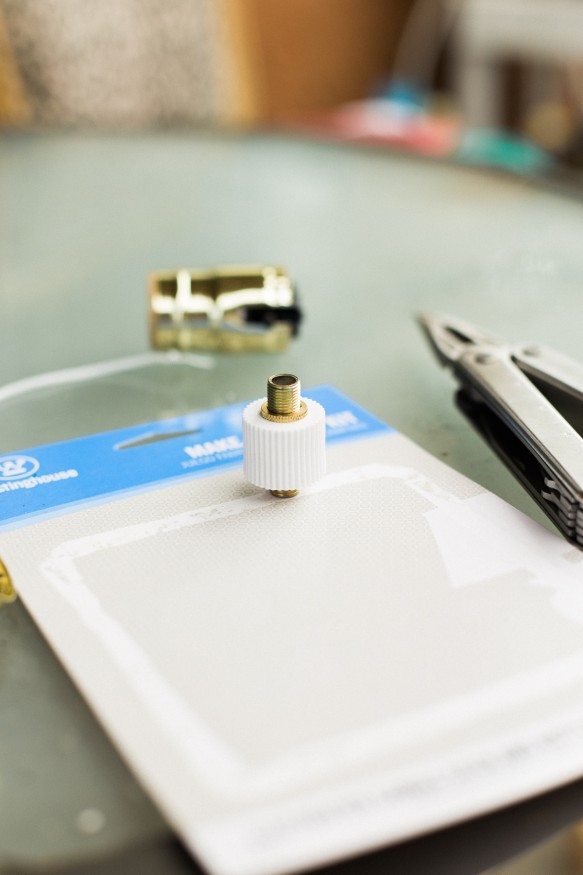
With a 1/4 inch hole cut into the center mark on your posterboard, Run the power cord through the part you just put together, (nut side facing back) then run the cable through the back of the poster board
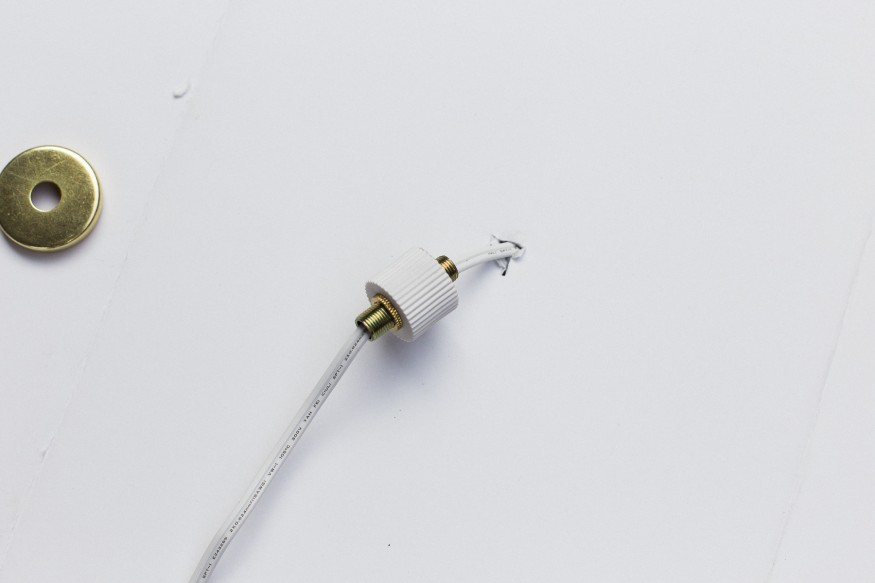
Stick the threaded end through the hole, and remove any piece of board that is covering up the threads
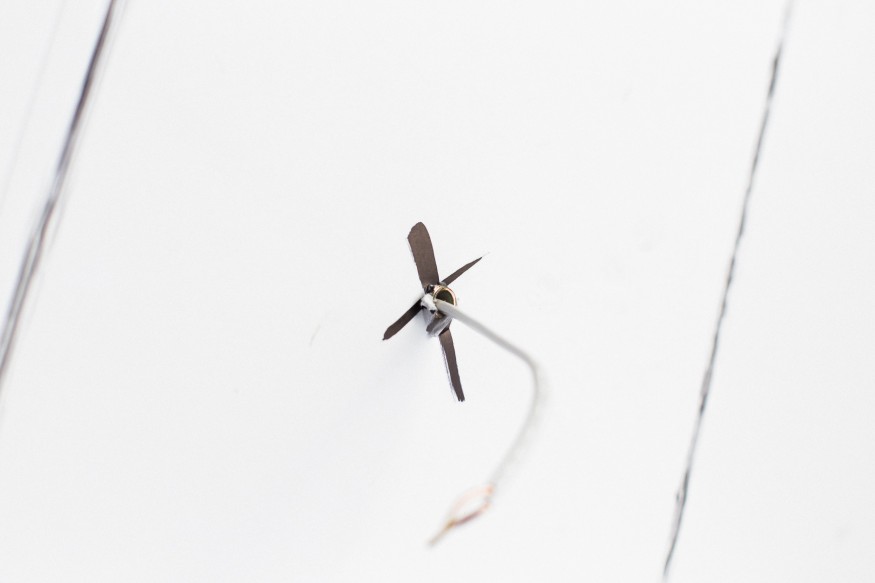
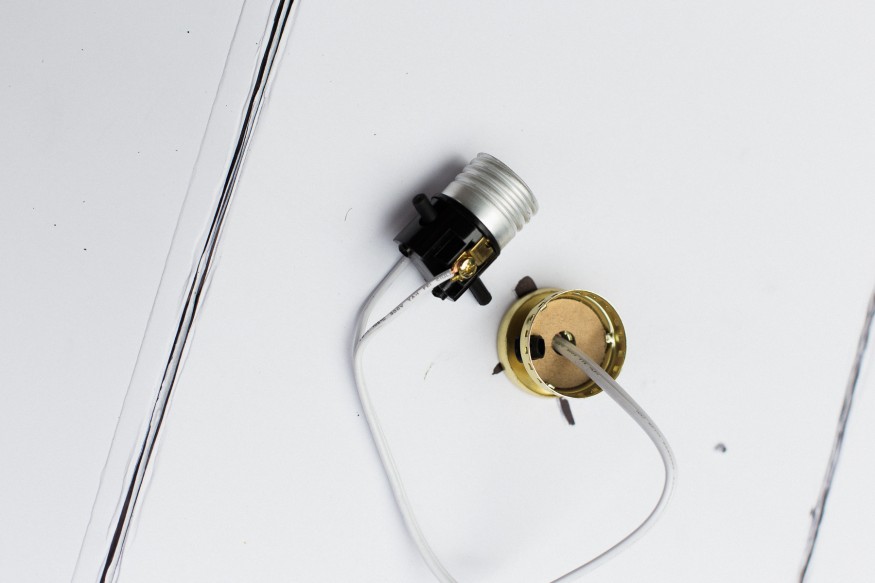
Now from the from of the board, take the round flat brass piece and place it around the threads that are peeking through the board, and thread the cable through the piece for the base of the socket.
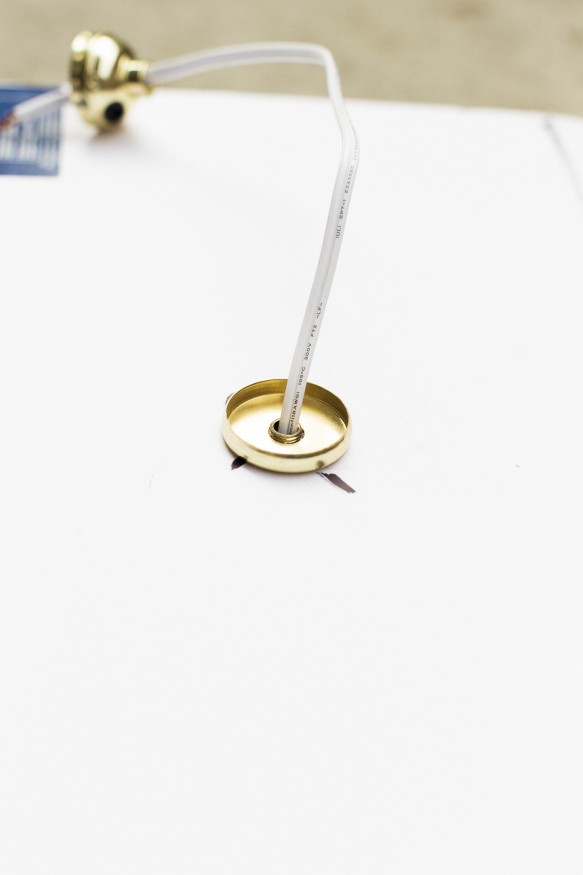
Thread the bottom half of the socket onto the threads sticking through the board. If you find its not threading, you may have forgot to loosen the screw on the base of the socket (no clue what that’s for).
Keep tightening until you have a firm fit.
Now wire up the cable to the top half of the socket, placing the ribbed cable around the silver screw and tighten..
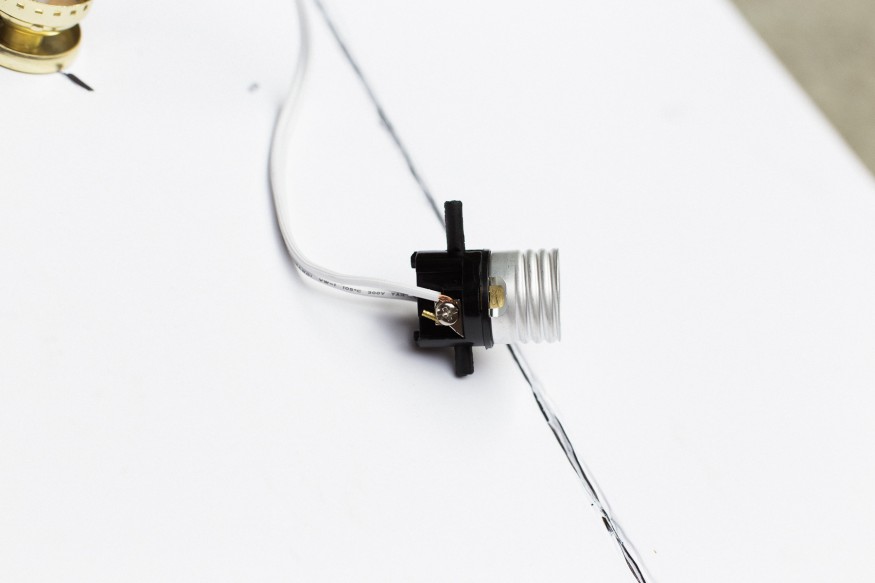
…and the labeled wire around the gold screw and tighten.
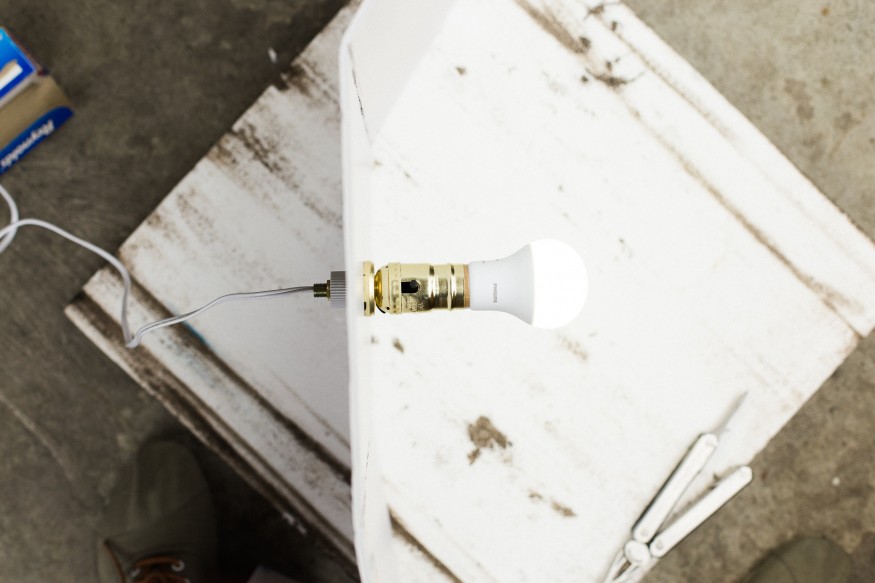
Put the brass sleeve on and snap into the socket base.
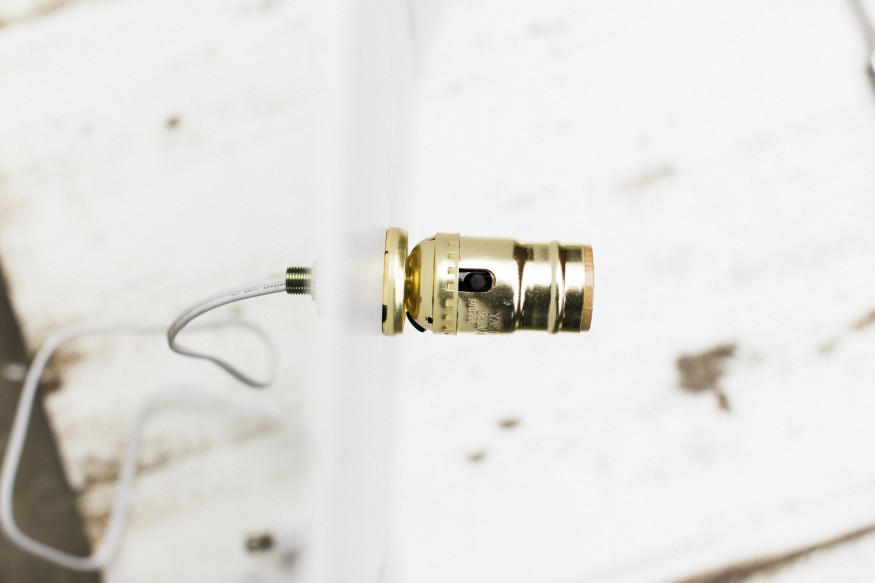
Put the light in the socket, plug it into the wall, and test! If it doesn’t light up, you either have the connections reversed, or not on tight enough, just squeeze and wiggle the top of the socket base until it comes lose to fix!
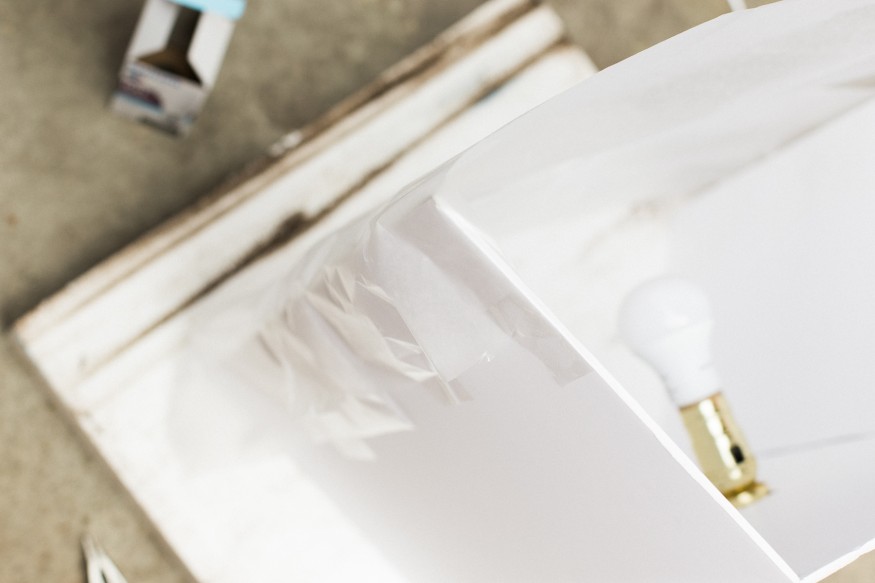
Adding Diffuser Material
Because we can’t have hard light you need to difuse the light. I found a cool “hack” using wax paper as a diffuser is a quick and easy way to soften your light, and it’s controllable, If you wnat softer light just layer more wax paper on with tape. If you’re going the “upgraded” route and using actual difusser material, that’s even better!
Measure the wax paper while the board is open and angled to the widest point you’re anticipating using it, then tape onto both ends
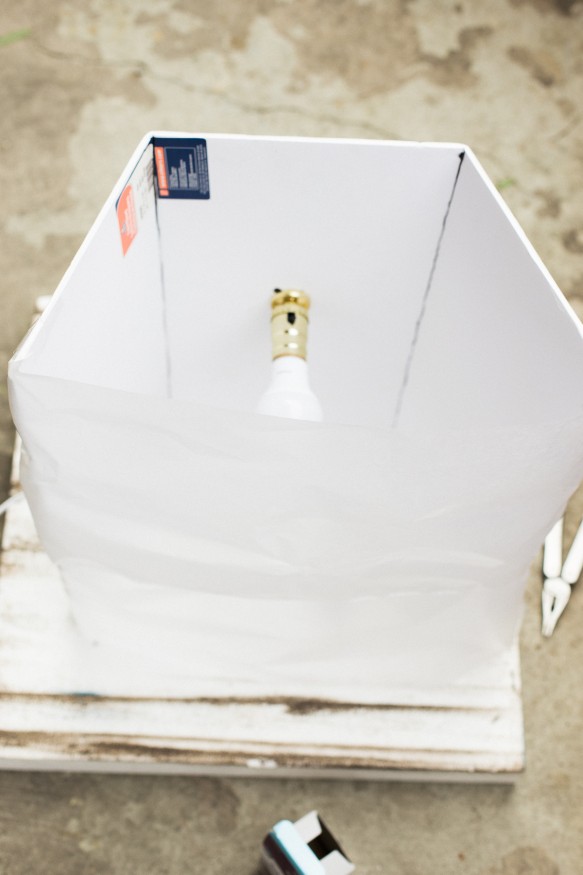
Note: for the wax paper I’m just using packing tape so that I can easily remove and replace as it wears down without ripping up the board. If you’re using diffuser material, you may want to look into use velcro tape so you can easily remove it!
Testing It out
So there’s 3 setups that I have the option to use:
- 1 Light only
- 1 Light + 1 Board as a fill card
- 2 lights
1 light set up
side note: Always shoot with all indoor lights OFF. If you keep other lights on in the hows your going to have white balancing issue with different temperature lights bleeding into the shot!
Using one light will give you a more contrasty feel with dark shadows, It’s not a setup I normally use but if you’re looking to have some “mood” to your shots, this is an easy set up. Play with the angles, I did my set up with a the light facing 45 degrees in front of the subject
Here’s how it came out:
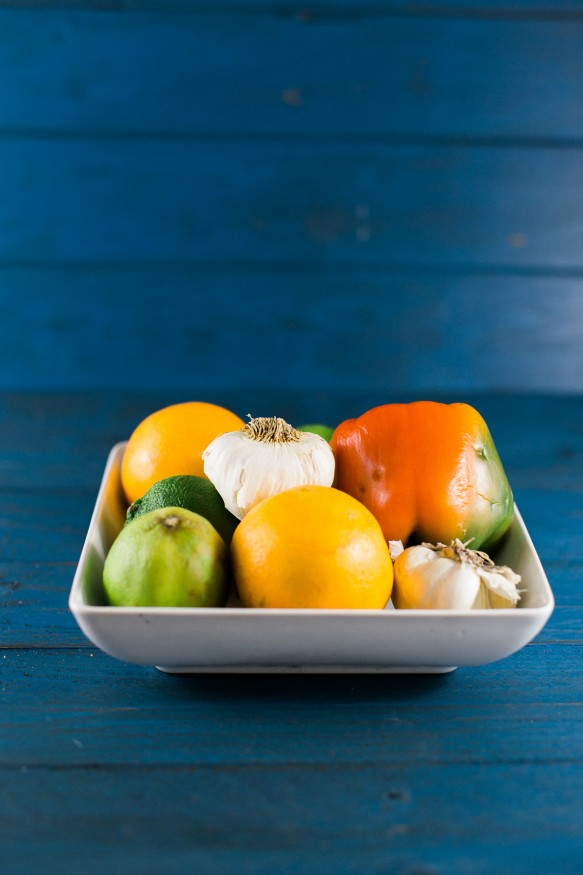
1 Light plus 1 or more fills
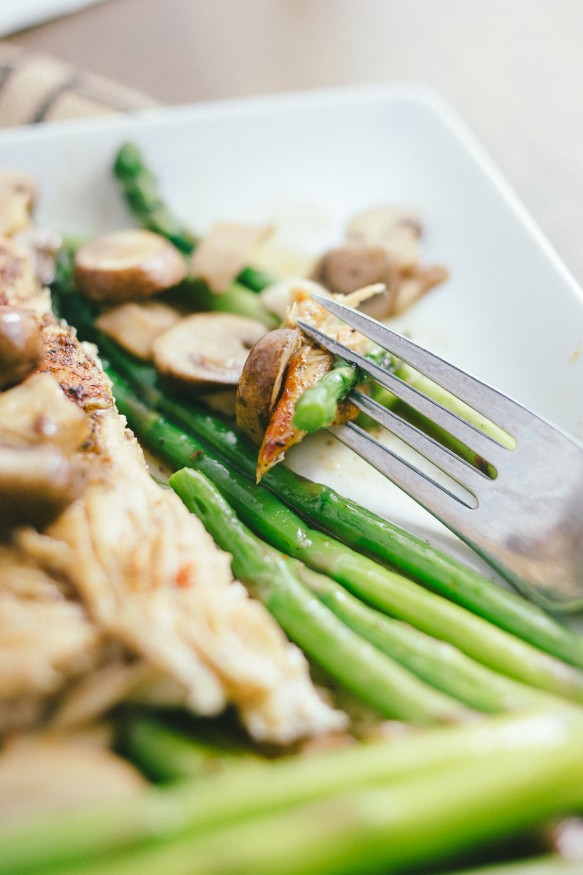
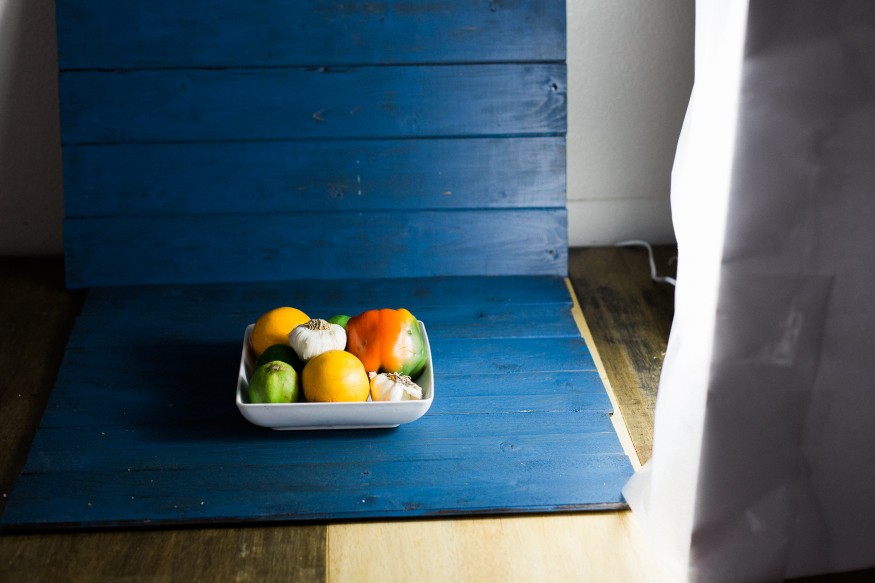
This is my normal way of shooting, even with natural light. I use my main key light, then fill shadows in with a poster board to even out the shot. Here’s an example on how to set this up:
You will still have shadows (with one layer of wax paper) but they are a lot softer with a fill:
As you can see the shadows have been softened A LOT and you get some light bouncing to give more depth to the subject
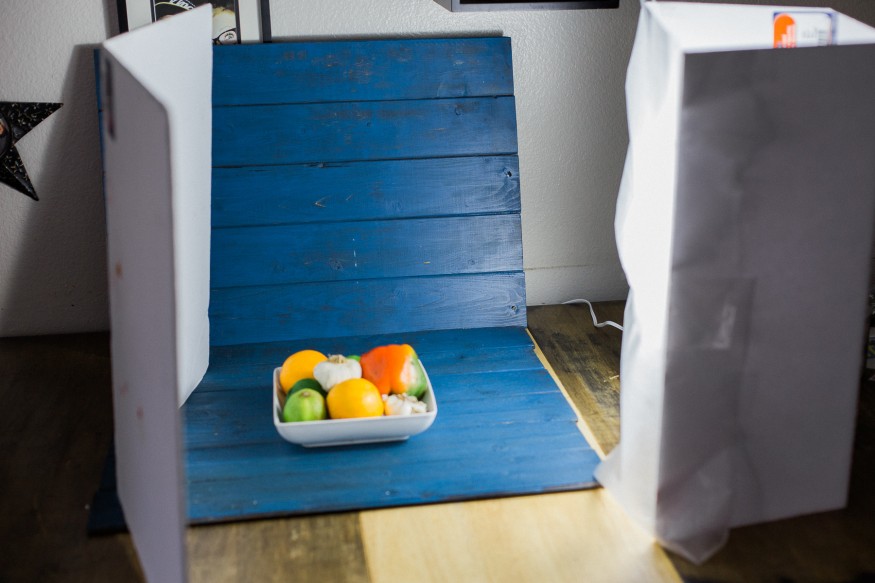
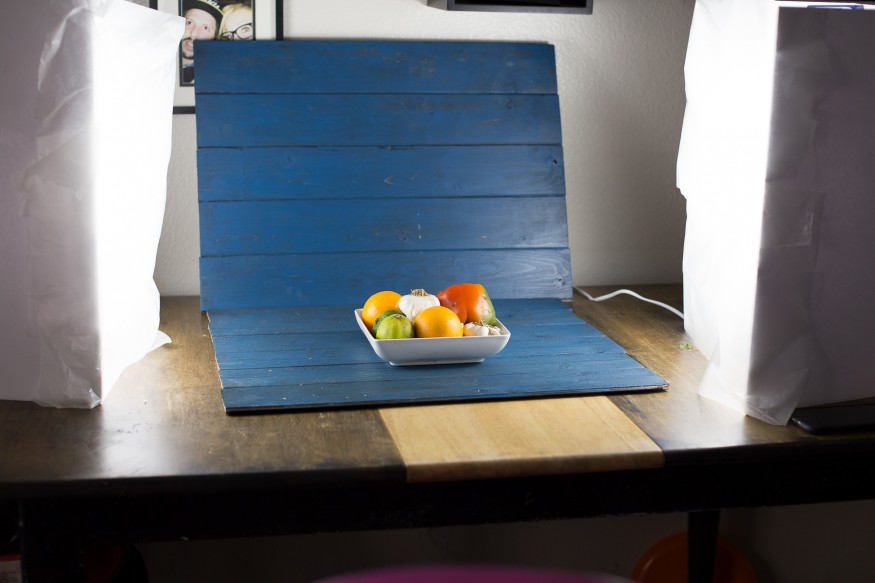
2 Light Set Up
This is a great setup if your camera doesn’t perform will at high ISOs and a fill card just isn’t doing the trick. I will say however, that this setup will have a learning curve because if you’re going for a “natural light” effect you’ll need to be careful about where you place both lights. You’ll either want to place one light further away, diffuse the light, or use a lower wattage so that you can get a natural key and fill look.
Here’s a quick example of how this setup would look:
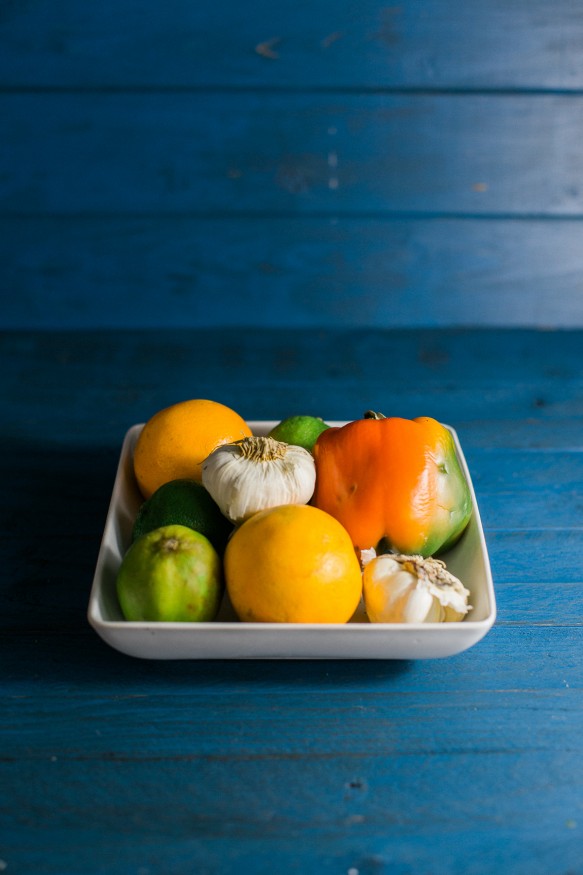
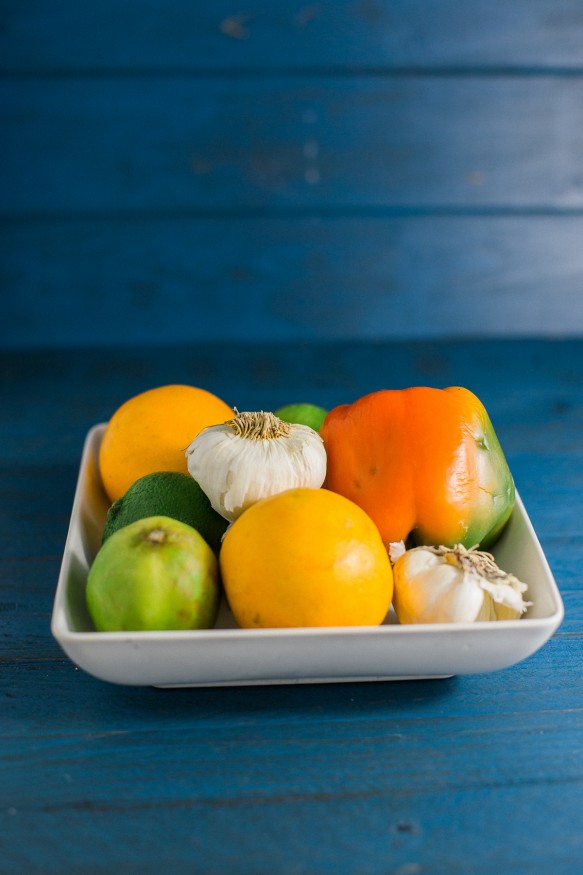
This isn’t a “natural light” set up since both lights are about equal distance from the subject, but it’s a good example of other styles you can shoot. Here’s the outcome:
As you can see on the from orange there’s 2 key spots on the orange, and not much shadow to the left and right. This is a great way to give a “shot in a studio” feel.
Storing them
So probably the biggest drawback to these tabletop lights is they aren’t the easiest things to stow away, I recently found that folding the sides closed with the wax paper/diffuser material collapsed inward, makes them as small as possible
So that’s it! Let me know if you built this and how you liked it, did you make any changes? I’d love to see them!
Oh I almost forgot..
Food Blogger Photography FB Group
If you want to get more tips on lighting, equipment, food photography staging and other food blog photography related help, I’ve started a group on Facebook that I’d love for you to join! Make sure to

4 Comments
Love the idea ! Thank you so much for sharing Derek 🙂
Thanks Ruwani, Glad you find it useful!!
Thank you so much for sharing this! Been looking into ways to up my food photography.
Glad to help Whitney! I find it hard to spend money on something I can make myself for less